Who doesn’t love a good project you can cuddle with later!!?
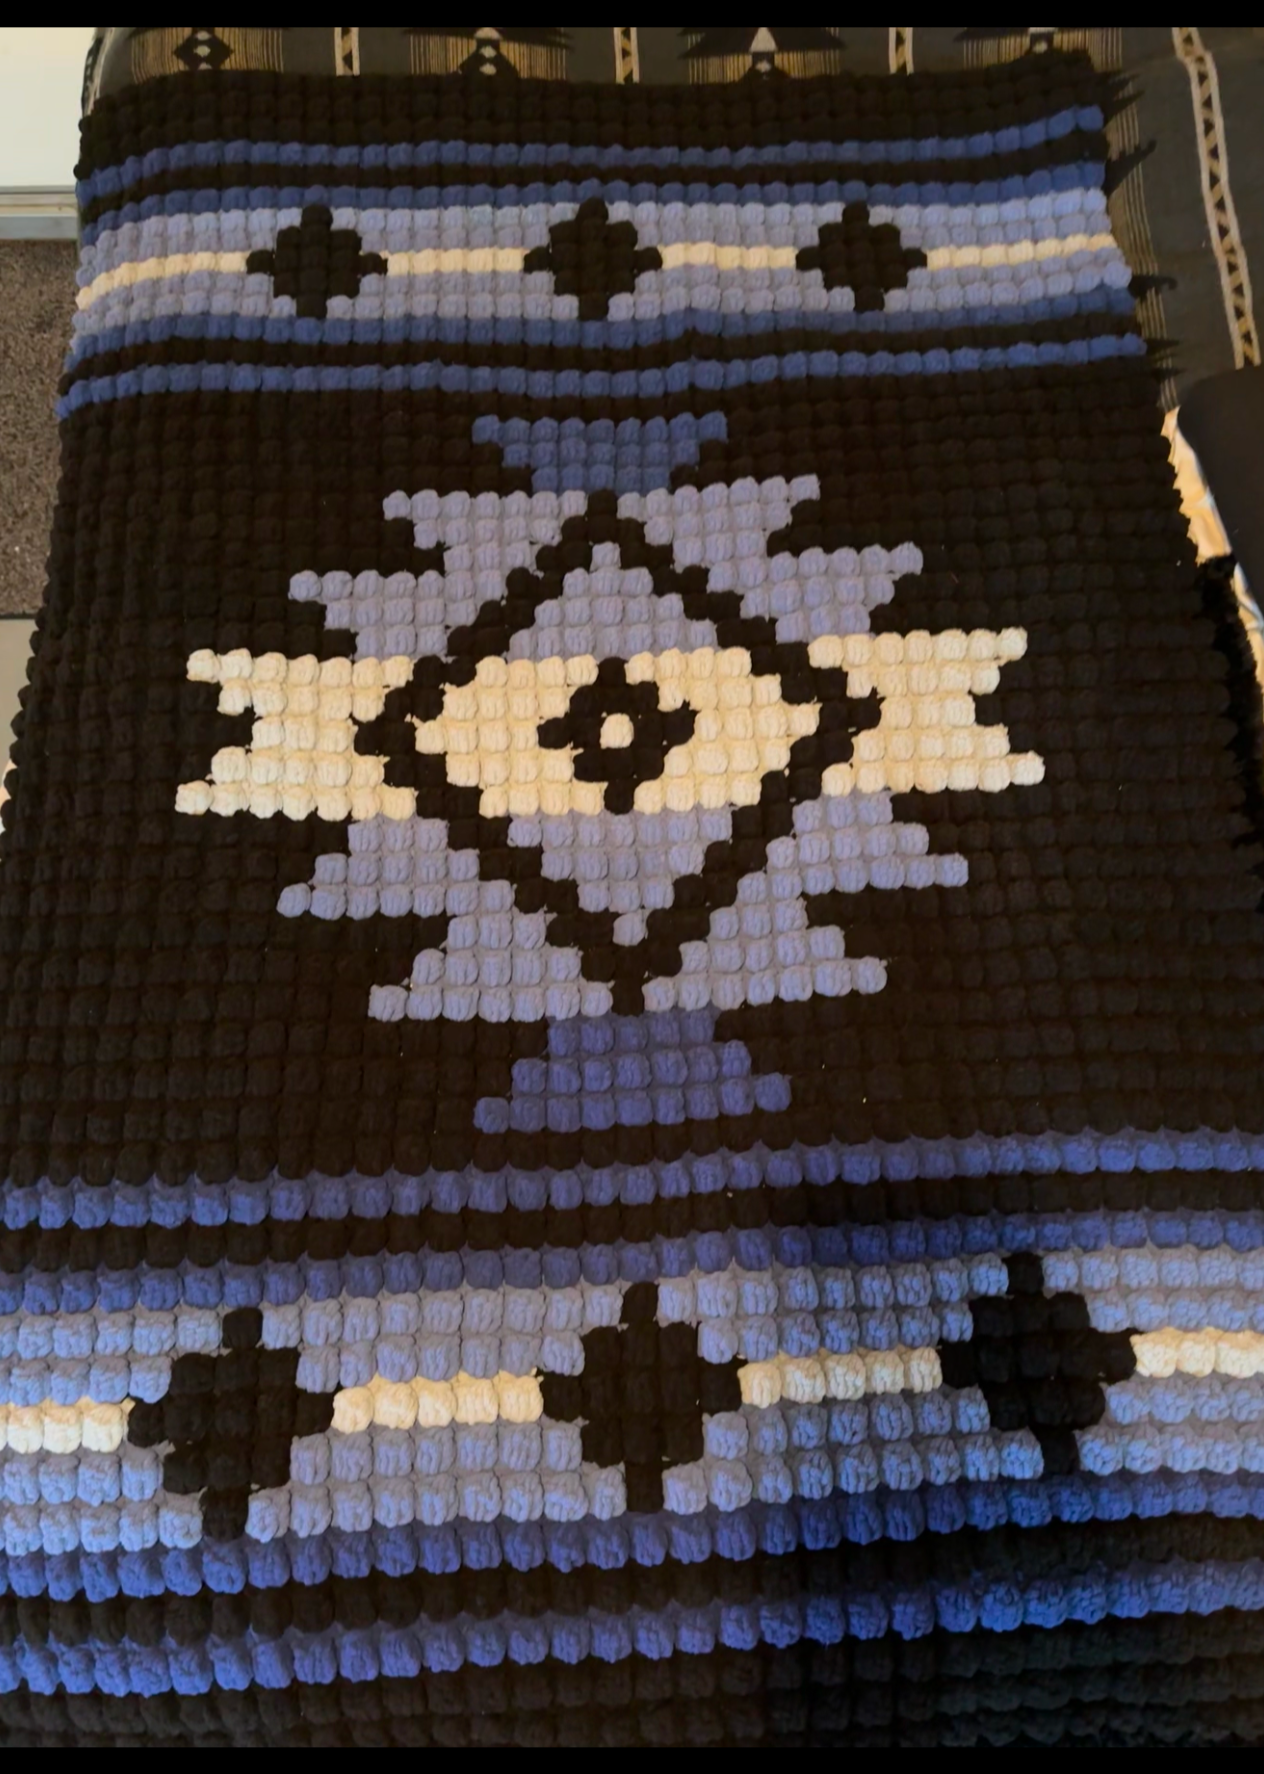
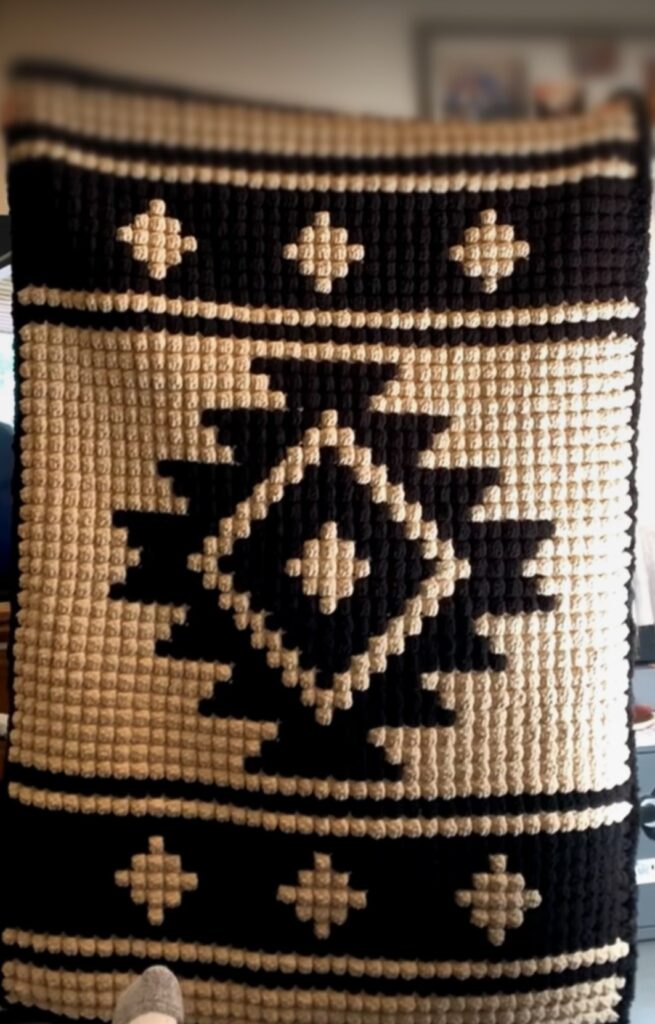
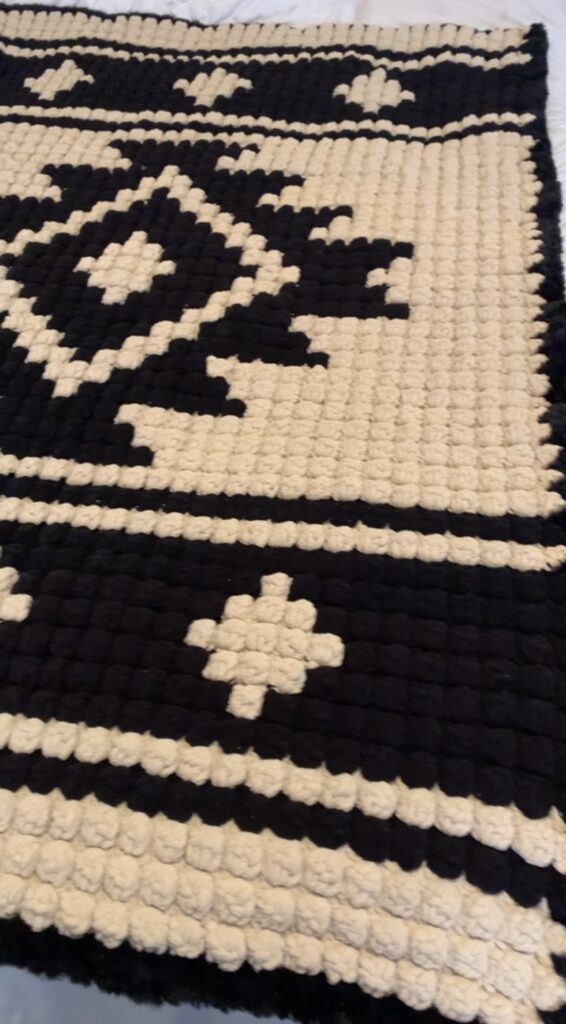
When I was young, I use to think crocheting was so lame, then I got older and I enjoy the lame, lame is so cool. 😊 My MIL helped me see how exciting it could be especially when I found the bobble stitch. At the time I thought that the bobble stitch was the challenge but now looking at it, it’s the different types of patterns that you can make with the Bobble stitch, that is where the challenge and fun begins. After this you can take it and make any pattern/picture and bobble it into a blanket.
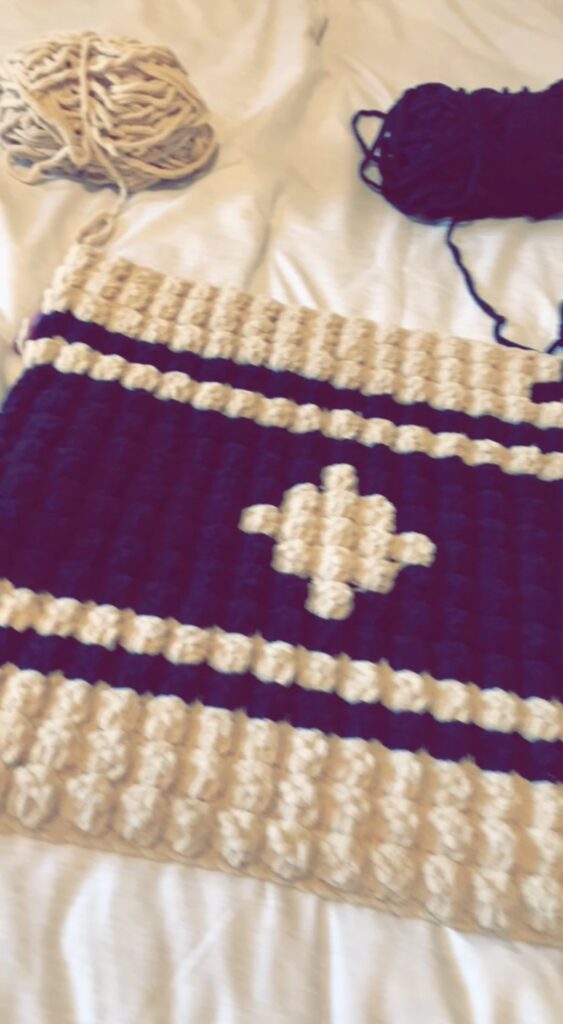
The layers
This is a very heavy weighted blanket if I’d had to guess I’d say about a whopping 6lbs. I truly believe everyone should try a heavy weighted blanket, the sleep in magical. Also, I use the Bernat soft baby yarn which is already thick. Now there are three layers to this blanket, and the center is not necessary but for the look of it, it was necessary for me. Let me explain, the bobble stitch will be pretty tight where there shouldn’t be any big holes, but you can very slightly see threw the bobble stitch, and I think it looks better to look at the center which is batting either white or black is better than seeing the fabric you pick to go on the back.

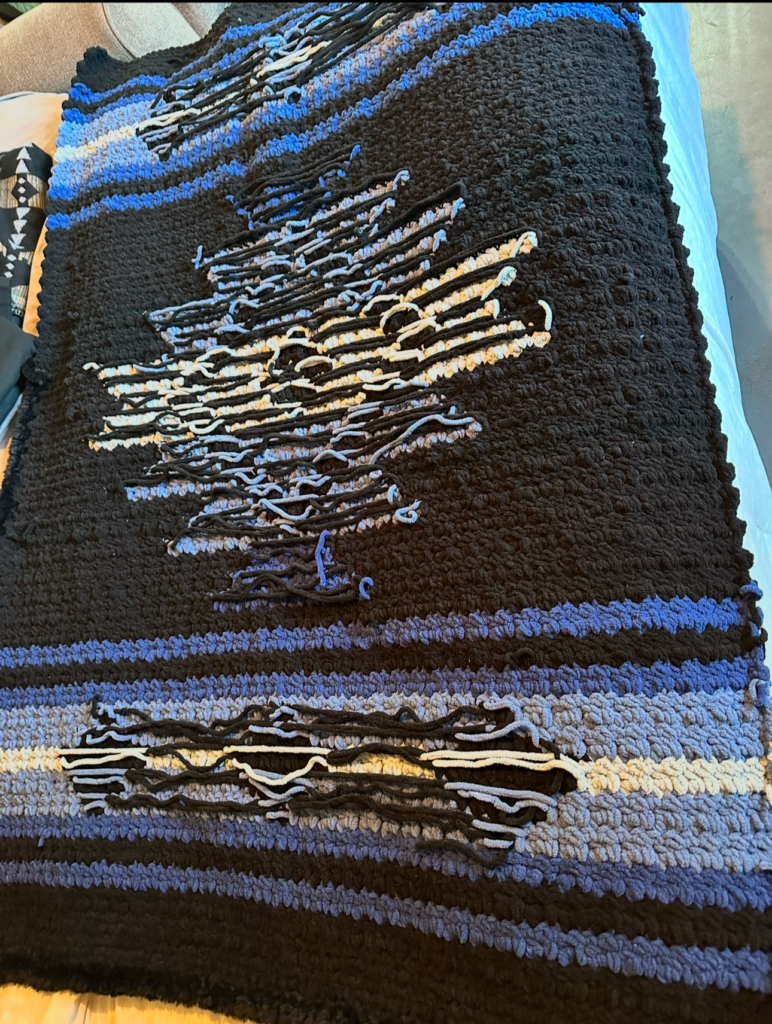
You might be questioning why you can’t just make the crochet part and be done. To make a pattern like this takes a lot of switching yarn color, so the back looks a little wild. I personally thinking searching for a fabric that goes perfect with the pattern theme is one of the best parts. For my ombre Aztec blanket I actually found the fabric first and the fabric is what inspired the bobble stitch part. So, now that you know the three layers, the bobble stitch part, the batting (the center), and the matching fabric, we are ready to begin bobbling!
Bobble stitch is easy. It’s just very repetitive.
Normally I think, in a bobble stitch blanket there is a single stitch that is put between each bobble but when making a big pattern like the Aztec blanket it is easier to have the bobbles side-by-side.
For the bobble you are basically clustering a whole bunch of yarn into a ball. Which is hugely why the blanket is so heavy! You will start with tying your yarn and making your first slipknot loop, from there you will make your first chain and hook over, pull through 78 times or the professionals would say odds plus one, but I’m gonna make it easy on you and just say the number. After you’ve done the foundation chain you have to go back through the foundation chain and do a single stitch crochet. Put your hook through the last hole you created in the chain (not the hole your hook is attached to, hook over, pull through, you should have 2 hooked on, one more time, hook over pull though both loops. Do that the 78x back down, and your finally ready to start the first bobble row.
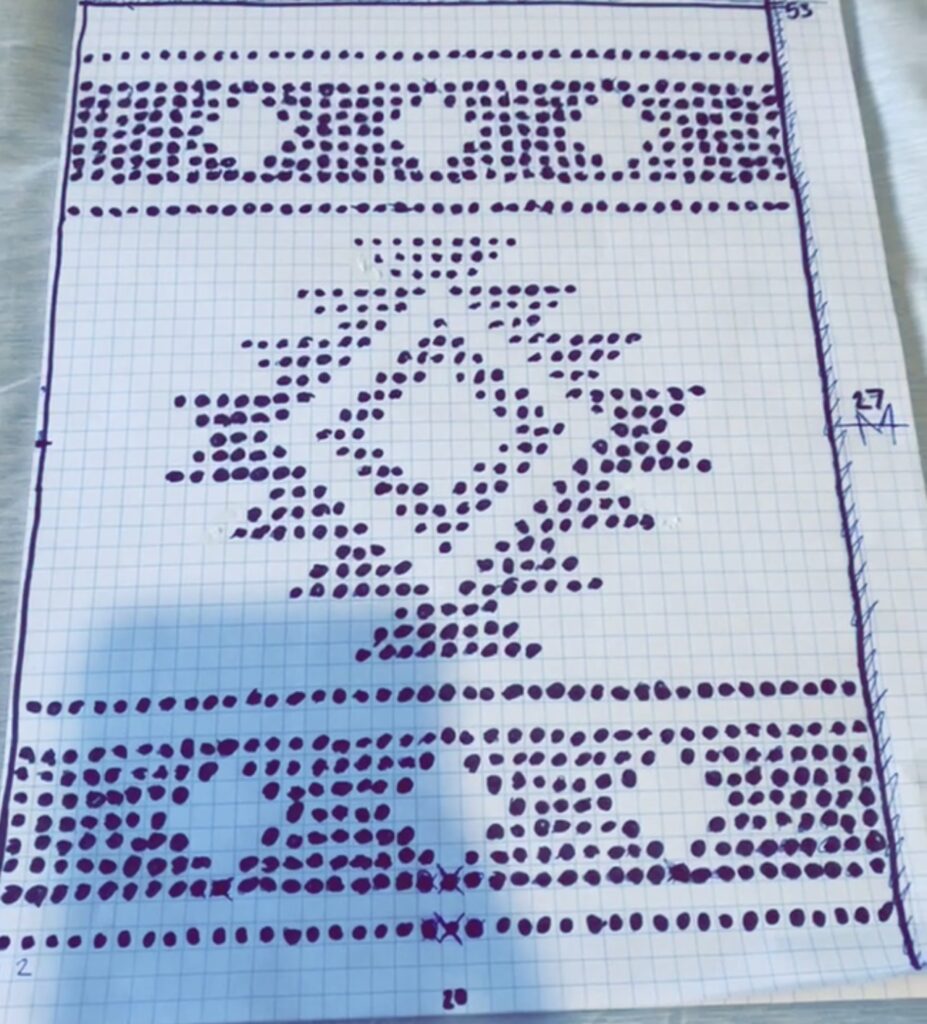
Although these blankets are lap blankets about 44inx56in and that’s 39 bobbles x 53 bobbles, you can definitely make this blanket bigger is you wanted or smaller. Now you need to make a single stitch chain between each bobble row, even though the bobbles go up 53 times that means you are really doing 106 rows up. Single, bobble, single, bobble etc.
Now the bobble. Hooking 6 times, then closing it with a single….. basically. To start each bobble row, you must start out chaining 3x up, then flip the entire row, so you finished the start row, and it sit to the right of you, move it so its sitting to the left of you, and that’s how you will bobble across.
Bobble
They call it the double crochet.
First hook over the yarn.
Put hook through the first hole.
Hook over yarn again, pull through.
You will have 3 loops on your hook.
Hook over, pull through ONLY 2 loops.
You only have 2 loops on hook now, you need 6.
Hook over yarn, put in THE SAME HOLE, hook over, pull through 2.
You now have 3 loops on the hook.
Hook over yarn, put in THE SAME HOLE, hook over, pull through 2.
You have 4 loops on the hook.
Hook over yarn, put in THE SAME HOLE, hook over, pull through 2.
You have 5 loops on the hook.
Hook over yarn, put in THE SAME HOLE, hook over, pull through 2.
You have 6 loops on the hook.
Now hook over yarn, pull through all 6 loops.
Put hook into THE NEXT HOLE, hook over yarn, pull though.
Finished your first bobble. You will get really fast at this I promise.
You continue the pattern all the way down the only difference is you don’t have to chain 3x up. Thats only for the first bobble in each row.
How to create the style.
Following the pattern
Once the first six stripes are done, you start the row that has the design. It’s very simple you tie on the other color; you won’t see it because you can push it to the backside. It’s also easier if you keep both yarns on, so you can avoid tying on again, and again. As long as you know where your center is and you keep count of where each color bobble goes, it’s gonna be perfect!
The back
I sew the batting to the fabric and then from there I hand stitch the fabric and batting on the crotchet.

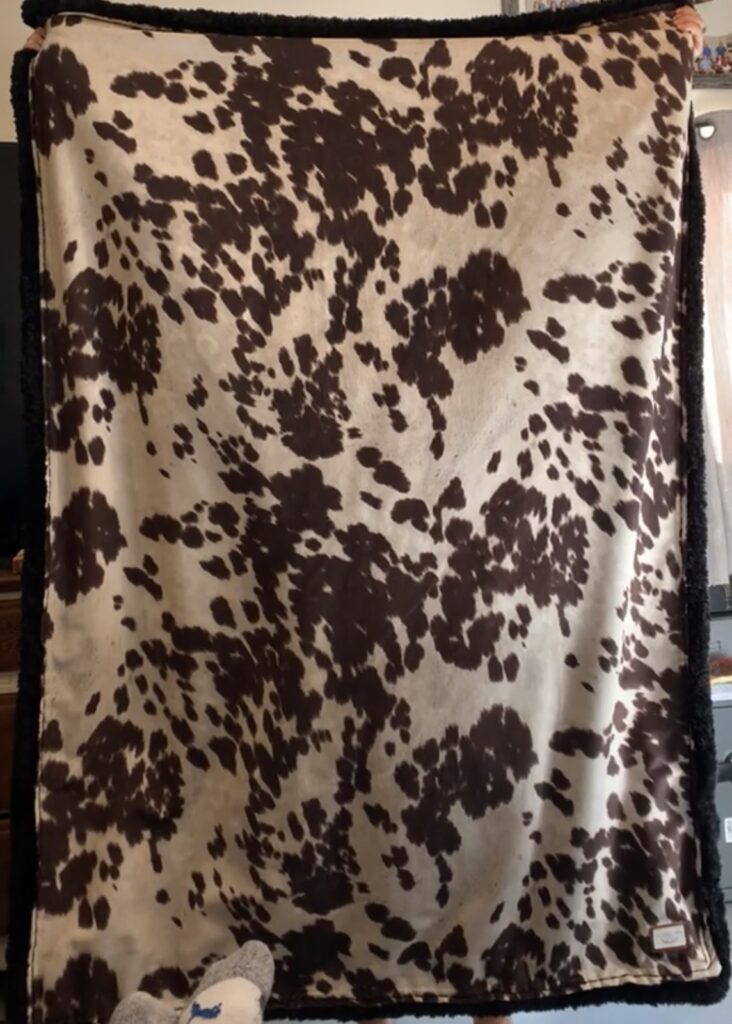
The boarder
You can do a lot for the border, but I love the look of faux fur plus it’s a quick and easy finish. I hope you gained some confidence for your next crochet project!. Let me know what you think or if you have any questions!