Epoxy and I have had our fun, good and definitely in this project you will see the bad!
The whatnot to do type of post! Yup, welcome to amateur hour.
I hope you weren’t expecting perfection because this project was my most exciting and most disappointing creation. I wish I could say I nailed this one exactly how I envisioned it, but I want to tell you what I did wrong and how I turned it somewhat around.
The Whole Idea!
So, I love me a nice epoxy table, today’s new trend is the river epoxy tables. Which are gorgeous, with the live edge wood and some have awesome items in the resin to make it different than others. What’s nice about wood is that it’s a timeless material, so wood furnisher will never go out of style, but it will definitely change its image over time. Now sort of the same thing with epoxy resin tables, of course there’s only so many ways you can do an epoxy river table before it’s all been done but there’s just so much you can do with epoxy its wild!
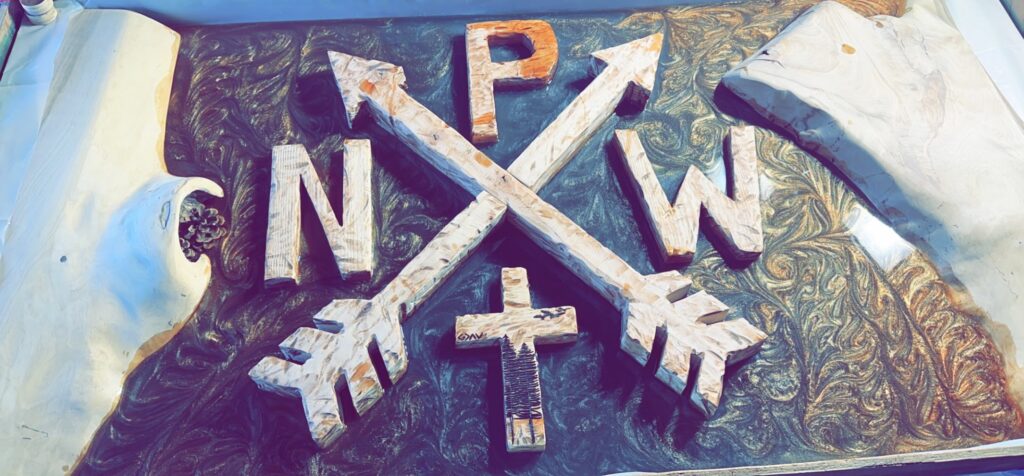
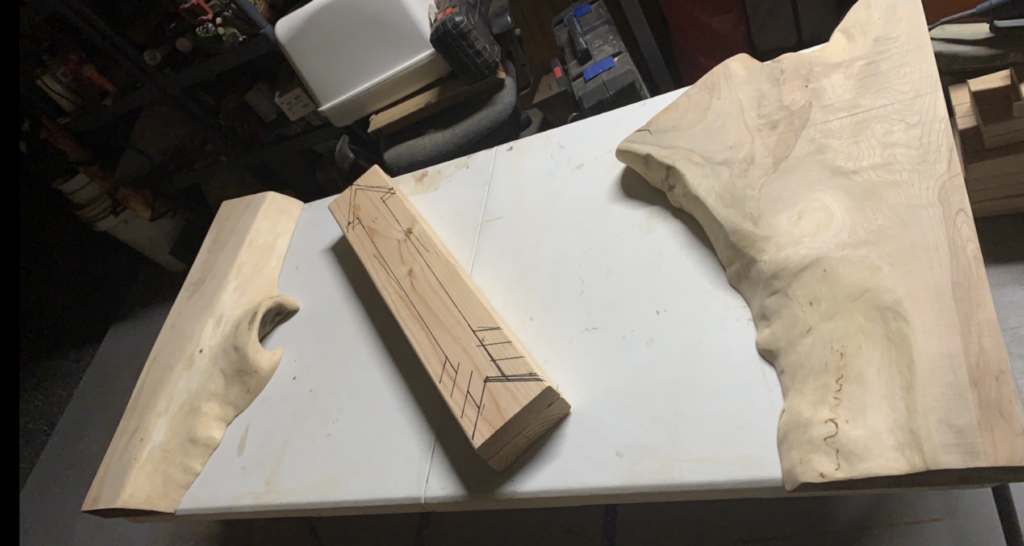
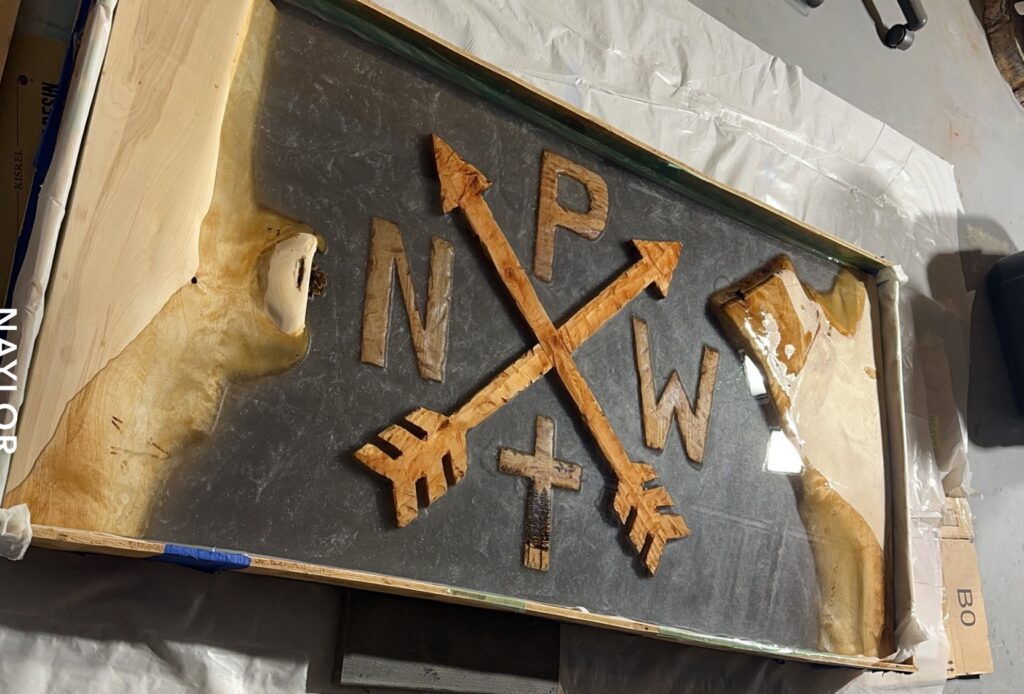
For this table I wanted to do something a bit different and represent where I’m from and my faith! I’m from the Pacific Northwest where the hunting and hiking and my faith are strong. So, I did the famous PNW with the arrows and a cross with forest trees painted on it. I found a beautiful piece of live edge birch that I cut in half, and it was perfect because the edges looked like mountains, and I loved the grain in the piece.
So deep pour epoxy is not cheap so I did my best to cut cost where I could, and I built my own box from scraps lying around and I just bought resin table to put in it and then I caulked the sides to prevent any leaks.

I had to cut out the letters, cross and arrows with my jigsaw and I used my power drill and a few different attachments to rustic them up.
Now the first half of this project turned out amazing and was coming out like everything I had hoped for and I was SOOOO proud of myself! Until it took a turn for the worse!
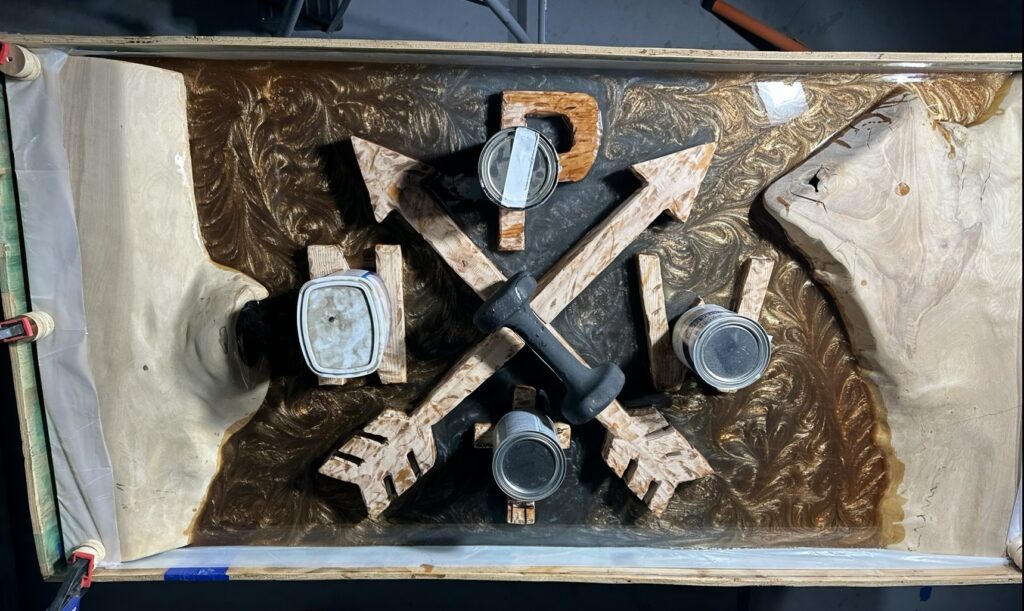
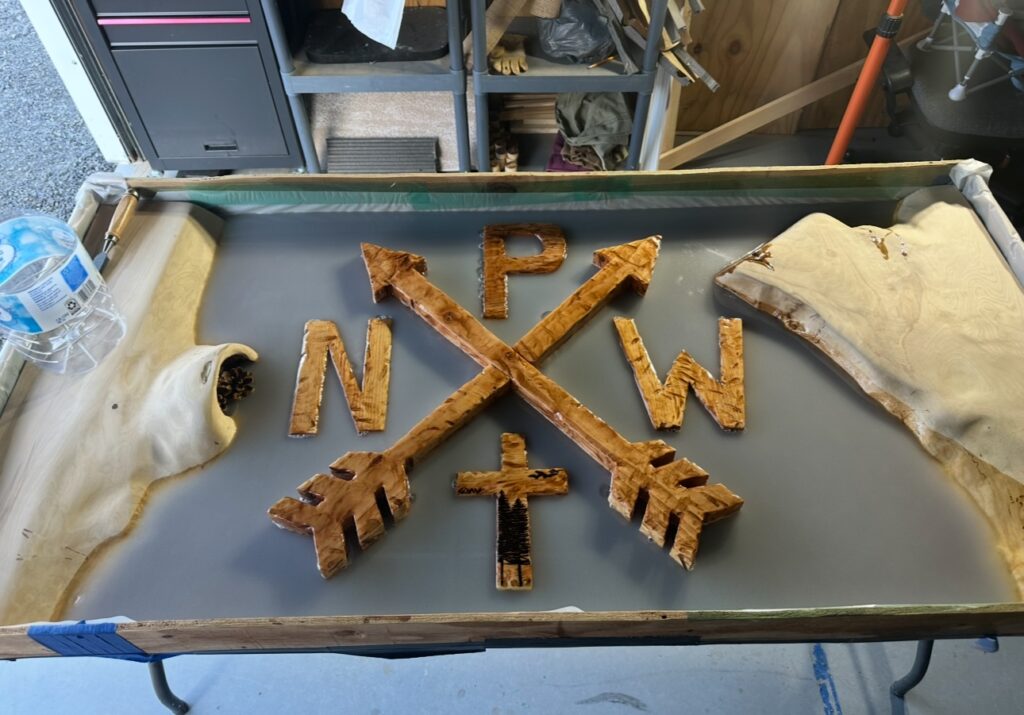
The two-tone epoxy turned out exactly how I wanted them to. I used a golden brown and a grey blue. I wanted this table to represent everything about where I’m from. From the wood and water colors to the pine cones I put in the tiny cave. To me this was perfection!!!!!! I even ordered cutsom c-channels for this table for support. So for instance the river epoxy table have good support because its like 80% wood 20% epoxy but with this table its like 60% epoxy and 40% wood and the epoxy is across the whole center. Plus the c-channels are beautiful!

So, there was 3 major mistakes that I messed up on, and they are not mistakes you ever want to make when it comes to epoxy.
The First Mistake!
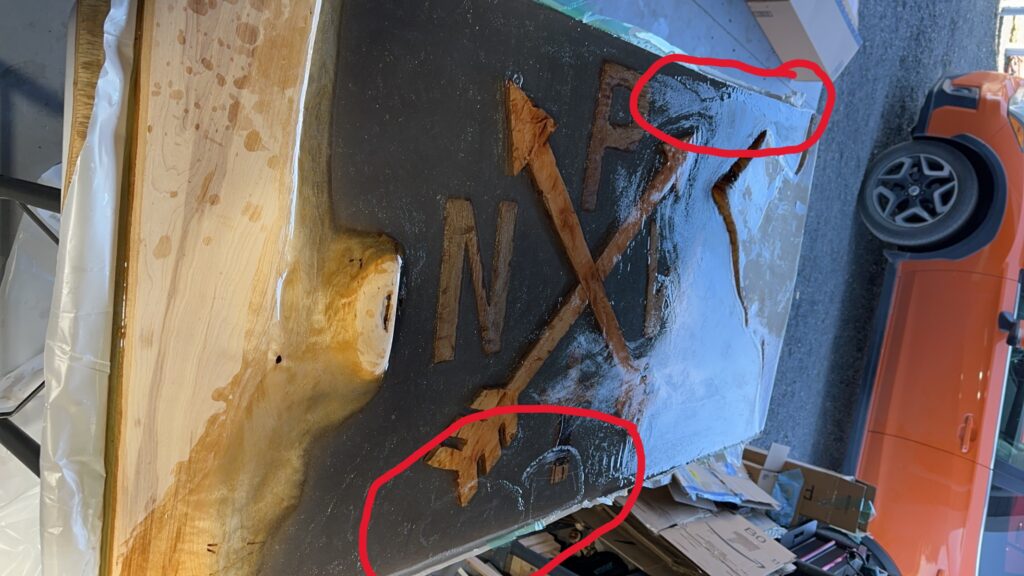
The first one, I wouldn’t say was technically my fault, but I should have known better have worked with mixing resin before, but I ordered CHEAP EPOXY!!!!! UGH!!!!! Now my first pour was the two pigments I poured in, next was supposed to be just crystal clear epoxy BUT IT WAS NOT CRYSTAL CLEAR!!! I mixed 3 gallons in a big 5gl bucket and when I mixed it I used my power drill and a mixing attachment to do a fast mix and when you do this it creates a lot of bubbles, which is normally ok if you want less bubbles when mixing you must stir slowly. Although there were lots of bubbles you just constantly use heat to pop them. When working on epoxy before I just came back very 40 min normally and used my heat gun, no problems…… until now! I poured this terrible epoxy in (knowing it was a little bit foggy) thinking I could fix it with heat. I was in fact scared at this point, but I told myself to come back in 30 minutes to see if had changed. IT DID NOT and even worst the epoxy had already harden! This epoxy was the craziest resin I had ever worked with. I was devastated to say the least, because even though this was cheap deep pour epoxy, this project was still near the $300 range and still not close to being finished.
The Second Mistake!
Now I pulled myself up by my bootstraps on this one and figured out how to fix this. I mixed more epoxy with a different color to hide the foggy garbage mess of the second batch of epoxy. Now this one was absolutely my fault and its something that can cost you SOOO much money and it also basic epoxy resin knowledge…. MIX YOUR EPOXY VERY, VERY WELL!!! You must scrape the bottom and the sides. The resin must mix fully with all of the hardener. This is epoxy common sense and sadly I didn’t have any that day! The only good thing that came out of this pour was it wasn’t the whole table it was only two locations that the resin wasn’t completely hard. These spots were very sticky and such a pain!. I will say in my defense I just had a newborn baby, and I had only 30 minutes to get this pour done at the time lol.
The Third Mistake!
I’m sure many of you have guessed this by now but the third mistake was not measuring how much epoxy I was going to need in the first place for this project! I should have measured the area in between the slabs, length and width and depth. Then multiplied the area by the desired thickness of the epoxy. Costly mistake of course.
Even with all these massive mistakes, I still am very proud of how it turned out and I learned so much from my mistakes. As we all should! I will one day attempt this table again it will be perfect! I am a little skeptical about working with epoxy again, but I will get back on the horse soon lol…. Now all this table needs is legs! And I know I said table the whole time but I actually made this to be a huge desk for my husband, but the dimensions are 64inx31in so still a table! Again, thanks again for giving your time to my word and imagination!! Leave me a comment on what you think or even if you have some great advice!!! I’d love to know!


5 Responses
Good https://lc.cx/xjXBQT
Good https://lc.cx/xjXBQT
Awesome https://t.ly/tndaA
Awesome https://t.ly/tndaA
Awesome https://t.ly/tndaA